I finally upgraded to Gary’s latest version of CoCo3FPGA. This includes 12-bit palettes, so the 16-color screens can now select from 4096 colors instead of 64, and a real 256-color mode. Vertical graphics resolution has also been doubled, so there is now a 160x450x256-color graphics mode. Pretty neat stuff.
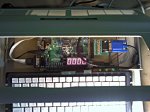
Of course a bigger palette requires further modification of the Digilent board. The Altera DE-1 already supports 12-bit color. Feeling lazy, I chose not to mess around with the existing modification, and opted for the second method Gary has provided, which is adding a VGA breakout board to connector B1. Instructions for doing this mod are in the documentation in the .zip file. There are also photos showing how to wire up the breakout board and a message describing the details.
Since I first installed the CoCo3FPGA bit file on the Spartan 3 board I had a problem with the Windows 2000 computer I had used to run the Xilinx WebISE software. So this time I installed WebISE 13.1 on my main PC, which is running Ubuntu LTS 10.04. I have to say, it strikes me as a bit ridiculous that just to program the flash ROM on the FPGA board I had to download a 4Gigabyte archive file (seriously!) I also had to compile a driver to get the parallel port JTAG cable working. (Apparently you need to compile a driver even if you’re using a USB cable.) This didn’t scare me — I’ve done plenty of that kind of thing in the past. But it seems like quite a few hoops to jump through for what should be a simple process. Furthermore, the process to compile the driver seemed a bit rinky-dink. I’m used to ‘make config’, ‘make’, ‘sudo make install’. But here you just do a ‘make’ and it will compile the module and plop it into the source directory. You can’t really install it to any sensible place automatically. I manually copied it to /opt/Xilinx/13.1/LabTools/LabTools/lib/lin/libusb-driver.so
But once you’ve got the software installed, you still need to figure out how to use it. It isn’t immediately obvious. The reason is that there isn’t a menu item or GUI widget called “Burn fusemap” or “Program device” or anything sensible until after you leap through some more rings.
First of all, I couldn’t get access to the parallel port as a regular user. There’s a way to make it work, but I didn’t have the patience to get that all set up, so I just ran the program as superuser. In order to get the application to see the library you need to load it on the command line when you start the program. I tried to put that all in Ubuntu’s Application menu, but it wasn’t happy. However the exact same syntax worked from a terminal window. Maybe I need to put something in quotes in the application launcher. I don’t know, but that’s an exercise for later.
So the command line ends up looking something like this:
sudo LD_PRELOAD=/opt/Xilinx/13.1/LabTools/LabTools/lib/lin/libusb-driver.so /opt/Xilinx/13.1/LabTools/LabTools/bin/lin/impact
‘impact’ is the one little program out of the 4G(compressed) of junk I had to install that you actually use to program the flash ROM. Yes, I realize that when Gary Becker releases the source as he’s said he plans to do, I may actually want to use a little more of the Xilinx software if I get ambitious and try to add my own features. But I think a lot of the stuff in there pertains only to other Xilinx parts. It would be nice if you could download and install just the parts you actually need.
Once you’ve got the program running (which you should do after connecting the JTAG programming cable to the computer and the FPGA board) it will ask if you want to automatically create a project file. My initial inclination was that I didn’t want a project file, as I simply wanted to burn a file that had already been created. Nope. Let it make a project file. It will then do a ‘boundary scan’, which means it will look for devices attached to the programming cable. On the Digilent board it should find the FPGA chip itself and a flash ROM. The CoCo3FPGA file needs to be put into the flash ROM. The Spartan 3 chip bootstraps itself from the flash chip upon reset.
After ‘impact’ finds the parts on your FPGA board an icon will magically appear on the toolbar allowing you to program it. Use the CoCo3FPGA.mcs file included in the archive. I gather that the .bit file itself is for programming the FPGA chip directly. This is probably not what you want, since it will not survive a power cycle.
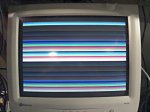
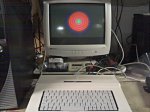
Gary includes a disk image file in the Altera DE-1 archive that has some BASIC programs on it, including a demo of the 12-bit palettes and the 256 color mode. For some reason that isn’t included in the Spartan 3 archive. So I downloaded the Altera version and got the demo disk. As neat as the demos are, I really want to see some digitized photos in 256 colors. I think that even with a 16-color image, having a palette of 4096 colors should produce a much better image than an ordinary CoCo 3 display (without tricks). And double vertical resolution ought to help as well. I’ll be really curious to see how the CoCo3FPGA’s real 256 color mode stacks up against the 8-bit artifact colors that are possible on a stock CoCo 3 with an NTSC monitor or TV. When I have something to show I’ll do a side-by-side comparison.
But for that I’ll have to cook up some kind of a quick and dirty picture file viewer. Time to do some programming.


Leave a comment